Two bags, two styles, one single trend. The Japanese knot takes over summer 2025 with two irresistible crochet...
Search in blog
Blog categories
Latest posts
-
 Two crochet bags: the Japanese knot tutorial that speaks the language of the Hadid sisters – summer 2025 editionRead more
 -
") Crochet under the sun: summer 2025 fashion to show off with your best friend (handmade hats included!)Read more
Crochet under the sun: summer 2025 fashion to show off with your best friend (handmade hats included!)Read moreTwo crochet hats perfect for summer: a bucket hat and a mesh hat — fresh, trendy, and easy to make with our free...
-
 The coolest clutch of summer 2025 — and you can make it in 2 must-have colors. Chiedi a ChatGPTRead more
Two irresistible colors, one project: the most wanted crochet clutch of summer 2025 is easy to make with the...
-
 Athens the crochet bucket bag to show off at the beachRead more
Last project of our Summer Crochet series! Athens is the crochet bucket bag inspired by the colors and elegance of...
-
 Paros the trivet fish a seaside-style decoration for your beach house and beyondRead more
Want to bring a touch of summer and seaside style into your kitchen? With our crochet tutorial, you can make Paros –...
Popular posts
-
 Crochet bags, the models for spring-summer.One of the most searched accessories on the web, patterns, tutorials, ideas, projects, accessories, here's how to...Read more
 -
 Crochet bags for spring summer 2024. 5 models of handmade sling bags.Discover the latest trends for Spring/Summer 2024 with our exclusive guide to 5 crochet sling bag models. Perfect for...Read more
 -
 The Crochet Net Bucket Bag: A Trendy Accessory for 2024Learn how to make a crochet net bucket bag with our simple and detailed tutorial. Use elastic cord, a size 5 crochet...Read more
 -
 Crochet rugs, a passion that is becoming a trend.In this article, dive into the art of crochet rugs and discover how to create unique and personalized pieces for your...Read more
 -
 From runways to street style: the trendiest crochet bags.Are you also passionate about handmade items and want to create your own capsule collection of crochet bags? Here are...Read more

From functional to ornamental, the button that's perfect for you.
Brief guide to the right choice of BUTTONS to apply to your handmade creation.
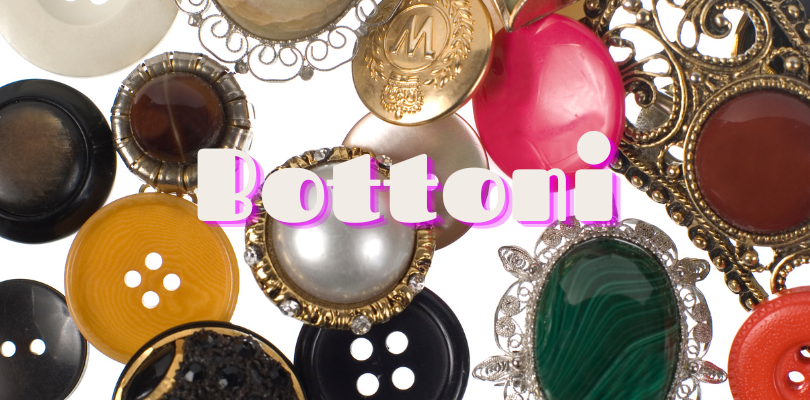
A choice based on functionality, shape, colors, dimensions...
But let's start step by step, let's begin to discover the meaning of the word and some news about the origins.
MEANING
BUTTON derives from the Latin BOTULUS, small sphere, the term has then been adopted in several European languages:
- BOUTON in French
- BOTTONE in Italian.
The term refers to a small OBJECT used to close a garment or an accessory, consisting of 2 parts:
- the main part: HEAD or FACE
- the back part: BUTTONHOLE or LOOP, through which the thread passes to fix it.
Let's start calmly the discovery of this wonderful detail.
To do it in the best way, we help ourselves with this very useful video by Valentina:
ORIGINS
The first question that arose when we started our research on buttons was:
''BUT WHO INVENTED BUTTONS?''
There is no name attributable to this invention but the origins belong to eras far from us, as they date back to 2000 B.C. We only know that the place of origin of buttons was the territory of Pakistan, where the first buttons made of poor materials appeared, such as:
bones, shells, nutshells, stones, brass, copper, and bronze.
The ANCIENT ROMANS used buttons made of precious stones and gems to decorate their clothes.
Initially, the use of buttons was only ORNAMENTAL, for FUNCTIONAL buttons the credit goes to China, in the 3rd century B.C. where they were applied to men's clothing, sewn with rope or cord and were made of wood or perforated stones.
In the MIDDLE AGES, they were considered luxury details, used on religious and noble garments.
In the 17th century, buttons began to be mass-produced and started to be widely used for military clothing.
In the 19th century, machines for button production were invented, they became more accessible and common, used for both men's and women's clothing.
So, there is no inventor of buttons, their invention is the result of multiple innovations over the centuries.
What are the elements that characterize buttons?
COMPOSITION
Materials used for the creation of these details that add a touch to our creations are really numerous:
- Polyester
- Plastic
- Resin
- Nylon
- Aluminum
- Metal
- Akoya mother-of-pearl
- Pearl
- Leather
- Wood
- Natural coconut
- Bamboo
- Eco-leather
- Recycled material
- Bone
- Swarovski
DIMENSIONS
The dimensions must also be evaluated according to the project to be carried out, there are the classic shirt ones with small diameters, medium ones for cardigans and blazers, and finally, there are larger ones used on coats or for ornamentation.
SHAPES
There is no standard shape for production, every geometric shape is used to create these creative details: circle, square, rhombus, hexagon, pentagon...
Shapes of objects such as: hearts, stars, pacifiers, flowers, ladybugs, butterflies, strawberries, small cars, animals, telephones, etc...
COLORS
As for colors, free choice to imagination, depending on the project you can select the color you like the most given the vast range present in the catalog.
For a winter creation, you might consider darker and more elegant colors, brighter or Christmas-themed ones,
For a spring or summer creation, you can consider fluorescent or more radiant colors, to give a sharp contrast or a tone-on-tone combination to the project.
''WHAT ARE THE DIFFERENT TYPES OF BUTTONS EXISTING?''
- 2-hole buttons: have two holes to be sewn onto the fabric.
- 4-hole buttons: have four holes, arranged in pairs, to be sewn onto the fabric.
- 6-hole buttons: have six holes, arranged in pairs, to be sewn onto the creation.
- Snap buttons: are buttons that join automatically thanks to a pair of complementary parts.
- Press buttons: are buttons that join thanks to the pressure exerted by the metal teeth on the back.
- Heart-shaped buttons: are decorative buttons in the shape of a heart.
- Jewelry buttons: are buttons decorated with stones, glitter, pearls, or crystals, used to add a touch of elegance to garments.
- Shank buttons: easy to sew thanks to the loop on the back.
"HOW TO CHOOSE THE RIGHT BUTTON BASED ON YOUR PROJECT"
Choosing the button based on the project
Elegant project
If you are working on an elegant project, you can consider a chic, elegant, and precious button in stone, Swarovski, or pearls.
Bag project
If you are creating a bag, you can opt for metal buttons to close the inner part and prevent items from falling out during movement. There are metal buttons that are applied by pressure, sewn, or fixed thanks to the presence of flaps on both parts of the button.
Child project
If you are making a garment for your child, there is a wide selection of child-themed buttons, more fun with shapes and colors for every taste. One of the most popular is the Manue button.
Here is a video where Valentina talks to us about baby buttons:
Winter coat project
If you are working on a winter coat, you can vary from the wooden toggle, classic of the '90s, or go for something large to give your project a wow touch.
BUTTON APPLICATION
''HOW TO APPLY BUTTONS WITH HOLES?''
- Prepare the thread, cut an amount that allows you to sew the button onto the garment.
For example: if the button has a diameter of 2cm you can cut about 50cm of thread.
- Start sewing.
- Place the button where you want it to be sewn and insert the needle from the back of the creation.
- Bring the needle through one of the buttonholes and through the other side of the creation.
- Make the loop.
- Place a knitting needle on top of the button, between the button and the creation.
- Use the knitting needle as a guide to sew a small piece of thread between the button and the creation, making a figure-eight motion.
- Do this a couple of times.
- Repeat.
- Repeat the process with the second buttonhole, ensuring the button is straight.
- Finish the thread.
- After sewing the last buttonhole, pass the needle through the fabric without going through the button, then tie a knot with the end of the thread and cut the excess.
''HOW TO APPLY SNAP BUTTONS?''
Let's start by saying that the snap button is a type of closure widely used for garments such as shirts, jackets, pants, bags, and much more.
Snap buttons were invented in the United States by a man named Hervey W. Walker in 1885. Walker patented his invention in 1885 and founded the Walker Manufacturing Company in Massachusetts to produce and sell his snap buttons.
Snap buttons were initially used mainly in the military field as a quick and easy way to fasten uniforms and equipment. However, over time, snap buttons have also become popular in fashion and everyday clothing.
It is a snap closure composed of two parts: a female and a male, both equipped with metal teeth that latch onto each other when pressed.
Here are the steps to apply the snap button:
- First of all, you need to have the parts of the snap button, i.e., the male part and the female part.
- Decide the point where to place the buttons. Usually, buttons are applied in pairs, with the male part positioned on the front of the creation and the female part on the back of the creation.
- Make two small holes in the garment, one for the male part and one for the female part of the button. You can make the holes with the help of suitable tools for fabrics or with a pair of pointed scissors.
- Place the male part of the button through the hole on the front of the creation and insert the metal teeth on the back of the garment.
- Place the female part of the button through the hole on the back of the project and insert the metal teeth on the back of the garment.
- Press the two parts of the button together until the metal teeth latch onto each other.
- Repeat the operation for the other button.
''HOW TO APPLY AUTOMATIC BUTTONS?
Automatic buttons, also known as snap buttons, were first invented by a man named Heribert Bauer, a German tailor, in 1885. His invention was patented in 1889 under the name "Federknopf-Verschluss" in German, which means "spring button closure".
Automatic buttons were initially introduced to be used on shoes and work clothes, but later their use spread to clothes, bags, and other accessories.
Over the years, many improvements have been made to automatic buttons, including the introduction of different materials for the buttons themselves and for the fastening parts, as well as different application techniques.
Make sure you have all the necessary items: automatic buttons, a pair of scissors, thread, and a needle.
- Place the two pieces of fabric that need to be closed together, overlapping them exactly as you want them to be closed.
- Measure where you want to place the automatic buttons, making sure they are aligned and positioned in the right direction.
- Mark the point where the button will be applied with a pencil or a pin.
- Prepare the needle and thread, choosing a color that matches the fabric well and threading the needle.
- Place the male half of the button on the top side of the fabric and the female half on the bottom side, aligning the holes.
- Start sewing from the bottom side of the fabric, inserting the needle into the fabric and then into the button hole, passing the thread through both.
- Repeat the previous step by passing the needle through the other hole of the button.
- Sew the thread inside the fabric and cut it.
- Repeat steps 6-9 for the other piece of fabric.
- Make sure the buttons close perfectly and are firm enough.
In this video, Andrea helps us apply these colorful snap buttons
CONCLUSIONS
In conclusion, buttons are much more than just a decorative detail on clothes, they are an essential part of fashion and clothing history, which has seen the evolution of buttons from decorative closures to functional closure systems like automatic buttons.
In addition to their practical function, buttons can be used as decorative elements that add personality and style to any garment. There are countless options of materials, shapes, and sizes for buttons, and the right button choice can make a difference in the overall look of the garment.
We hope these tips will be useful to you and encourage you to use the right model for each project.
Rosaria Tessiland®
