Two bags, two styles, one single trend. The Japanese knot takes over summer 2025 with two irresistible crochet...
0 prodotti 0
Your cart is empty
Search in blog
Blog categories
Latest posts
-
 Two crochet bags: the Japanese knot tutorial that speaks the language of the Hadid sisters – summer 2025 editionRead more
 -
 Crochet under the sun: summer 2025 fashion to show off with your best friend (handmade hats included!)27/07/2025Read more
Two crochet hats perfect for summer: a bucket hat and a mesh hat — fresh, trendy, and easy to make with our free...
-
 The coolest clutch of summer 2025 — and you can make it in 2 must-have colors. Chiedi a ChatGPT23/07/2025Read more
Two irresistible colors, one project: the most wanted crochet clutch of summer 2025 is easy to make with the...
-
 Athens the crochet bucket bag to show off at the beach20/07/2025Read more
Last project of our Summer Crochet series! Athens is the crochet bucket bag inspired by the colors and elegance of...
-
 Paros the trivet fish a seaside-style decoration for your beach house and beyond17/07/2025Read more
Want to bring a touch of summer and seaside style into your kitchen? With our crochet tutorial, you can make Paros –...
Popular posts
-
 Crochet bags, the models for spring-summer.29/04/2023One of the most searched accessories on the web, patterns, tutorials, ideas, projects, accessories, here's how to...Read more
 -
 Crochet bags for spring summer 2024. 5 models of handmade sling bags.05/04/2024Discover the latest trends for Spring/Summer 2024 with our exclusive guide to 5 crochet sling bag models. Perfect for...Read more
 -
 The Crochet Net Bucket Bag: A Trendy Accessory for 202401/06/2024Learn how to make a crochet net bucket bag with our simple and detailed tutorial. Use elastic cord, a size 5 crochet...Read more
 -
 Crochet rugs, a passion that is becoming a trend.21/01/2024In this article, dive into the art of crochet rugs and discover how to create unique and personalized pieces for your...Read more
 -
 From runways to street style: the trendiest crochet bags.06/09/2023Are you also passionate about handmade items and want to create your own capsule collection of crochet bags? Here are...Read more
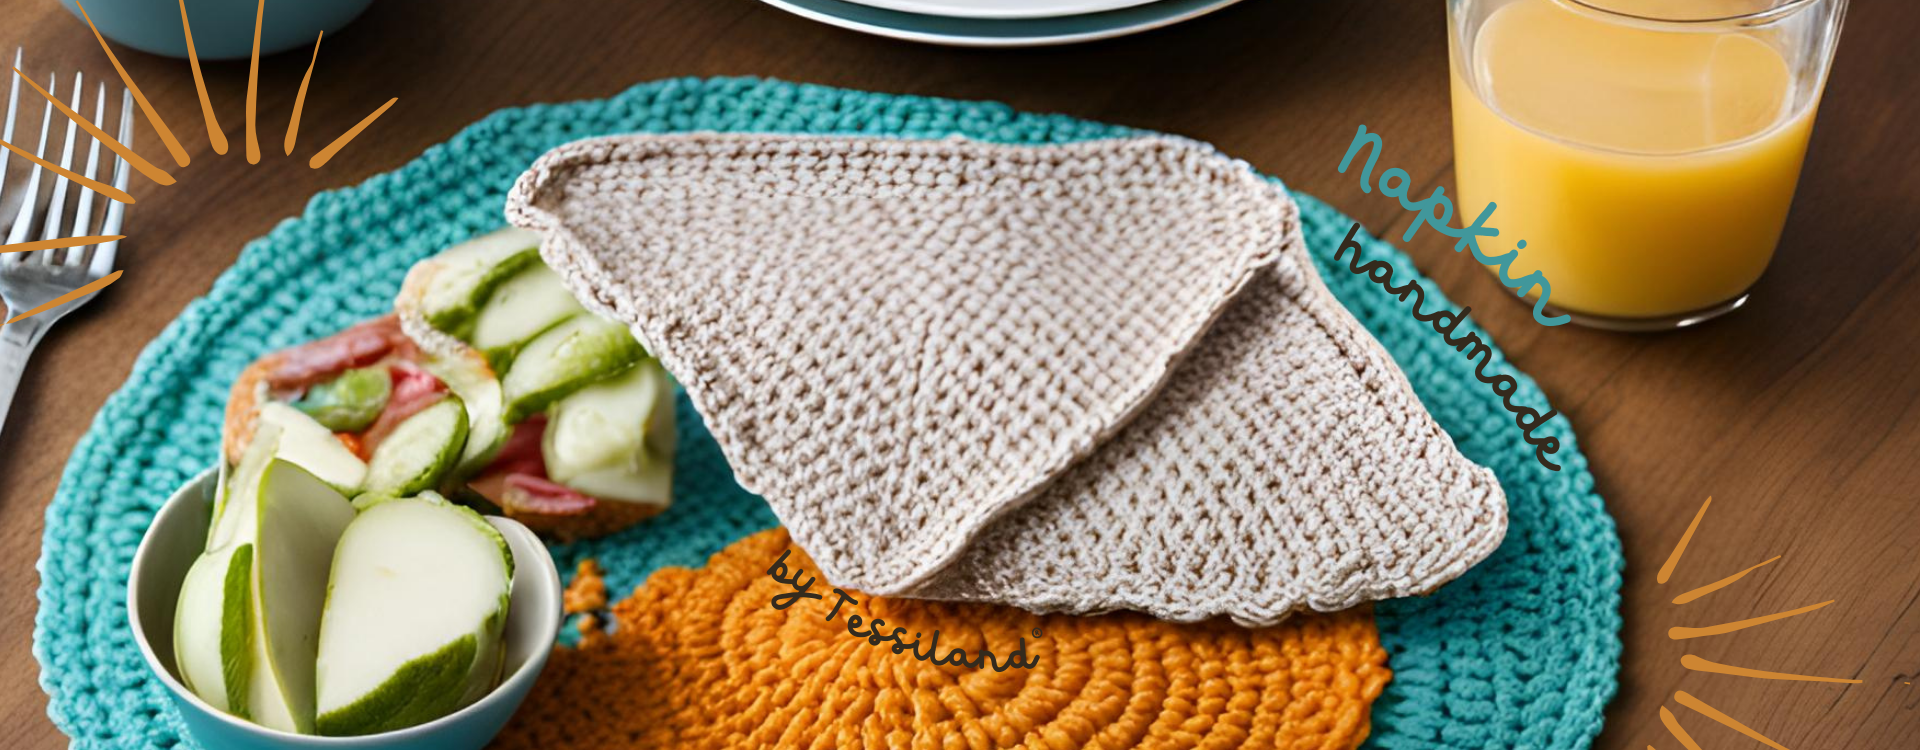
Napkin handmade, the must-have for autumn.
September is the month of new beginnings: summer holidays are now a memory, and we return to the daily routine, made up of lunches at the office, quick breakfasts, and preparations for school. It is the ideal time to take care of yourself, not only from a nutritional point of view but also from an aesthetic one. In this context, handmade placemats become an essential accessory, a small daily luxury that combines beauty and functionality.
Stylish Office Lunches
Returning to the office after the holidays can be a bit stressful, but there are small tips that can make this transition more pleasant. A handmade placemat, with its vibrant colors and unique textures, can transform even the simplest of lunches into a moment of relaxation and beauty. It’s not just an aesthetic matter: these placemats are made with high-quality materials, often natural and sustainable, that not only protect the surface of the table but also provide a clean and tidy base for your meal.
Imagine opening your lunchbox at the office and placing it on a colorful placemat, perhaps decorated with patterns that recall the summer that has just passed. A small gesture that can make a big difference, making your lunch more inviting and enjoyable.
Perfect for the Little Ones
Handmade placemats are not just for adults. They are also perfect for the little ones, to slip into their backpack for school lunches. Made with durable and easy-to-wash materials, they are ideal for resisting inevitable stains and spills during meals. Additionally, their colorful and playful designs can make lunchtime more cheerful and engaging for children, helping them enjoy this moment with peace of mind. We are fans of animal-themed placemats; in fact, we are currently working on a black and white placemat featuring the face of a panda, which we will show you soon.
A Touch of Elegance for Breakfast
Breakfast is the most important meal of the day, and in September, many of us decide to adopt a healthier eating plan. Why not make this moment even more special with a handmade placemat? Whether you choose an elegant and minimalist design or a more lively pattern, the placemat can become the perfect complement to start the day on the right foot.
A table set with care, even for a quick breakfast, can motivate you to maintain good eating habits. It’s a small ritual that adds value to your meal, making it not only healthier but also more enjoyable.
A look among the creatives.
Browsing through the various channels of our favorite creatives, we decided to select some projects and save them in this very practical guide to making handmade placemats.
Crochet Maniak
We start with the legendary Cao from Crochet Maniak, here we have 3 models, circular in shape, handmade and designed for breakfasts or for a home style with a shabby or Provencal touch.
First project:
Made with ternes cord.
For the next two projects, the protagonist is jute.
Second project:
Third Project:
Here you can view the Jute:
Brunaticality
A completely English idea we take from the charismatic Bruna, who also proposes a circular model, made with the TOP of Tessiland cords, the Thai Sublime.
Here are the instructions for its creation.
Egle Breme.
An easy and quick model, made mainly with double crochet stitches, to be used both as a placemat and as a plate mat, is proposed by Egle Breme, known for her skill with knitting needles, both straight and circular, but we also find her to be excellent with crochet.
Here is the tutorial:
Model made with the TOP of Tessiland cottons, namely Iggy.
A cotton placemat, all crocheted.
We thought of creating for you and with you a very comfortable placemat to practice our knowledge of the basic stitches seen previously.
We will learn to work in straight rows with a very simple single crochet, we will mix and match the colors following the nuances of our homes, and we will add a handmade touch to breakfasts or break times at home.
Technical Sheet.
Techniques used.
- Stitches - single crochet
- Create a simple rectangle with crochet
- Add a single crochet border in 2 rounds around a rectangle
- Join the rounds with a slip stitch.
Dimensions of the placemats.
The finished placemat measures:
30.5 x 23.5cm, including the border.
Yarns used.
Iggy, 100% twisted cotton, soft and shiny. Oeko Tex® certified. Weight 50 grams, length approximately 125 meters. Recommended needles 3-3.5, crochet hook 2.5-3.
How much yarn to buy?
For 6 placemats 2 balls of 50g, you can take 6 colors to alternate the nuances to work and match.
Crochet Hook
We recommend an ergonomic hook size 3.5
Abbreviations.
cat: chain
DL: right side
m: stitch(es)
mb: single crochet
mbss: slip stitch
rep: repeat
RL: wrong side
seg: next
Color Combinations.
The six placemats are made with different colors, with a contrasting border, as follows:
Color Combination 1: placemat in A, border in B
Color Combination 2: placemat in B, border in A
Color Combination 3: placemat in C, border in A
Color Combination 4: placemat in D, border in C
Color Combination 5: placemat in E, border in D
Color Combination 6: placemat in F, border in E.
To make the placemats.
Base Chain:
Make 55 ch.
1st row (RS):
1 sc in the 2nd ch from the hook, 1 sc in each ch to the end, 54 sc.
2nd row:
1 ch, 1 sc in each sc to the end.
(Mark the right side of the work with a marker, so you know on which side to end).
Rep the second row until the work measures 21.5cm, ending on a WS row.
Cut the yarn but do not fasten off.
To make the single crochet border.
With the loop still on the hook after the last row and with the RS facing, work a single crochet border in rounds using a contrasting color.
1st round:
Along the top edge of the placemat - with a contrasting color for the border, 1 ch to pull the new color through the loop on the hook, 3 sc in the first sc (corner st of the placemat). Continue along the top edge, working 1 sc in each sc along the top edge of the placemat to the last sc (next corner st), 3 sc in the corner st.
Along the first side edge - *Mark the middle of the first side edge with a marker, 17 sc evenly along the side edge to the mark, 17 sc to the next corner st.**
Along the bottom edge of the placemat - 3sc in the corner st, 52 sc evenly along the bottom edge to the next corner st (working 1 sc in each ch along the bottom of the foundation chain).
Along the second side edge - 3sc in the corner st; rep from * to ** as for the first side edge. Join the round with a sl st in the first sc. Do not turn the work, but continue with the RS facing.
2nd round (RS):
1 ch, 1 sc in the first sc, 2 sc in the next sc (corner st), 1 sc in each sc to the next corner st (sc in the middle of the group of 3sc), *2 sc in the center corner st, 1sc in each sc to the next corner st; repeat from * to the end, join with a sl st in the first sc.
Fasten off.
To finish the placemats.
With a sewing needle, sew in all the yarn ends.
Block and press on the wrong side with a damp cloth.
Continue with the others until you have six, and your table will have new accessories that will brighten your days.
Rosaria Tessiland®
.jpg)


