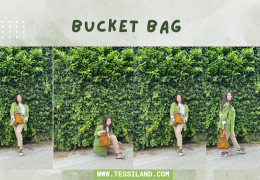
Last project of our Summer Crochet series! Athens is the crochet bucket bag inspired by the colors and elegance of...
DIY CLOTHING: Differences Between Yarns and Techniques for Beginners (and Beyond)
Your guide to start creating fashion with your own hands
.png)
Okay guys, I confess: I’ve gotten hooked. After taking you into the colorful world of DIY BAGS — here’s a super quick recap of the last three episodes:
-THE GUIDE TO THE RIGHT ACCESSORIES.
-PRACTICAL GUIDE TO LINING, YARN, AND PATTERNS FOR EVERY SEASON.
Today I’ve decided to launch a new series dedicated to the world of clothing for beginners and beyond. If you love creativity, fashion, and the idea of making something with your hands… you’re in the right place. Together we’ll discover step by step how to get started, which tools to choose, and how to turn simple stitches into real wearable pieces.
A gift for you: at the bottom of the page you’ll find links to the recommended products to get started and a small practical exercise with instructions!
FIRST STEPS INTO THE WORLD OF CROCHET
.png)
What you need to get started
You only need a few tools to start, but it’s important to choose them well:
- Crochet hooks (we recommend a size between 4 and 6 mm for beginners)
- Medium-thick yarns (acrylic or cotton blends: easy to work with)
- Scissors
- Yarn needles for finishing touches
- Stitch markers to avoid losing your thread… literally!
- hook verve scissors
- needles stitch markers
The basic stitches to learn
Start with these 5 essential stitches:
- Chain stitch (ch) – the foundation of all crochet
- Single crochet (sc)
- Half double crochet (hdc)
- Double crochet (dc)
- Magic ring – perfect for working in the round
Here’s a very useful article I wrote a few months ago with all the explanations of the basic stitches — perfect if you want to refresh your memory or try out this wonderful WORLD OF BASIC CROCHET STITCHES.
Practice exercise
Don’t forget that, just like in any field, training is key to developing your creative side in crochet. Make a small test swatch:
- Chain 15 stitches
- Work 3 rows of single crochet
- 3 rows of half double crochet
- 3 rows of double crochet
This will help you feel the difference between each stitch and recognize the structure.
INTERMEDIATE TECHNIQUES
.png)
Feeling confident? Great! Now you can start adding variety and structure.
What is an increase in crochet?
An increase is used to add stitches within a row or round to widen the work. It’s essential for shaping garments (e.g. sleeves, shoulders, hips, necklines) or for working in the round like hats or top-down tops.
How to make an increase in crochet (in straight rows)
Basic example: Increase with single crochet
- Work one single crochet as usual.
- In the same stitch, insert the hook again.
- Work a second single crochet.
Result: where there was only one stitch, now there are two. You made an increase.
You can do the same with any stitch (half double crochet, double crochet, treble crochet, etc.): Just work two (or more) stitches into the same base stitch.
How to make an increase in the round (e.g. magic ring)
When working in the round (like for grannies or circular tops), increases help keep the work flat.
Example: second round after the magic ring.
- You worked 6 single crochets into the magic ring.
- In the second round, make 2 single crochets in each stitch of the previous round → you get 12 stitches.
- Third round: 1 single crochet, then an increase (2 in the same stitch) → repeat.
Increases must be spaced evenly to achieve a smooth, round shape.
When are increases used in garments?
- To flare a skirt
- To shape the side of a top or vest
- To create raglan or bell sleeves
- In top-down projects, in specific spots (shoulders, armholes)
Practical tip: If you’re a beginner, use stitch markers to remember where you made an increase. This helps keep your work symmetrical.
What is a decrease in crochet?
A decrease is used to reduce the number of stitches in a row or round. It’s very useful to narrow the work — for example to shape a neckline, waist, or sleeve of a garment.
Simply put: It means working two (or more) stitches together to turn them into just one.
HOW TO MAKE A DECREASE WITH BASIC STITCHES
I’ll explain the most commonly used ones in simple terms
Single crochet decrease (sc2tog)
- Insert the hook into the first stitch and yarn over → you have 2 loops on the hook.
- Insert the hook into the next stitch and yarn over → now you have 3 loops.
- Yarn over and pull through all 3 loops.
You’ve turned 2 stitches into 1.
Half double crochet decrease (hdc2tog)
- Yarn over, insert the hook into the first stitch → yarn over → 3 loops.
- Yarn over again, insert into the second stitch → yarn over → 5 loops.
- Final yarn over and pull through all 5 loops together.
Double crochet decrease (dc2tog)
- Yarn over, insert into the first stitch → yarn over → 3 loops.
- Close the first 2 loops.
- Yarn over again, insert into the second stitch → yarn over → 4 loops.
- Close two loops, then close the last two.
Result: you have one stitch where there were two.
Where are decreases used in garments?
- To narrow the waist of a top, cardigan, or dress
- To shape the shoulder or sleeve
- In V-necks
- To create flared or tapered effects
TIPS FOR BEGINNERS
- Use stitch markers to mark where you start decreasing.
- If you get confused, practice on a swatch!
- For an invisible decrease, there are also advanced versions (e.g., "invisible decrease" in single crochet), but the classic ones are perfect to start with.
Decorative stitches
- Granny square – a versatile and colorful classic
- Popcorn stitch – volume and style
- Fan stitch – elegant and airy
YOUR HANDMADE WARDROBE
.png)
The goal of this module is simple but essential: to help you create garments that truly reflect who you are.
Not just nice to look at on social media or on a hanger… but to wear, live in, and love every day.
Creating a handmade wardrobe means combining personal style, practicality, and satisfaction. Here’s how to start off on the right foot – or rather, with the right hook!
How to choose the right project for you
Are you just starting out? Begin smart:
Start with simple, linear patterns, such as:
- Panel-style summer tops
- Tank tops using basic stitches or granny squares
- Shrugs open in the front (no sleeves or collars)
On the other hand, avoid (for now):
- Oversized garments: they require more calculations and yarn
- Very intricate or lace patterns: beautiful but tricky to size properly
Tip: choose panel-based patterns (front + back), as they are easier to manage and adjust along the way.
Tips on sizing, measurements, and adjustments
People often think that following a pattern is enough when crocheting. But a well-fitting garment comes from accurate measurements and conscious choices. Here’s what to keep in mind:
1. Learn how to take your body measurements
A key skill for a handmade wardrobe! All you need are:
- Bust circumference
- Length from neck to hips
- Shoulder width
2. Understand the structure of the pattern
There are two main approaches:
- Top-down: perfect for making adjustments as you go. Start from the neckline and work downward, adapting width and length to your needs.
- Panel-based (front and back sewn together): easier to manage, ideal for beginners.
Tip: if you’re unsure, start with a vest or a tank top made of rectangular panels. They’ll help you understand how the yarn behaves without the added challenge of sleeves.
3. Choose the right yarn for a good fit
The fit of a garment also (and greatly!) depends on the type of yarn:
- Yarns that are too stiff may pull and not drape well.
- Yarns that are too soft or heavy may stretch out the work.
The best ones to start with?
- Cotton-acrylic blends: easy to work with, hold their shape, washable
- Slightly elastic or soft-spun yarns: softer on the skin and more moldable
Create your first garment as if it were a dress rehearsal: try it on as you go, take notes on every adjustment and… don’t be afraid to make mistakes!
Every stitch brings you one step closer to a wardrobe full of handmade love, yarn, and thread.
YARNS: HOW TO CHOOSE THEM BASED ON PROJECTS AND SEASONS
.png)
Choosing the right yarn is the key to a successful garment. Even the most beautiful pattern can turn out heavy, uncomfortable, or hard to wear if made with the wrong yarn.
This is why it’s essential to match yarn, season, and project, finding the right balance between aesthetics, comfort, and functionality.
Summer – Freshness and lightness
In summer, the keyword is breathability. You need a yarn that doesn’t trap heat, lets the skin breathe, and works well with openwork stitches or mesh garments.
Choose:
- Natural cotton: cool, matte, ideal for tops, tank tops, shrugs, and summer dresses.
- Lyocell: known for its sustainability and technical features that make it suitable for various uses, including clothing, underwear, and home textiles.
- Plant-based viscose: shine, lightness, and softness.
Recommended yarns:
Frida – cotton blend with a handcrafted feel
Viscoiggy – shiny and soft summer yarn
Ecodonny – fresh, matte, 100% natural
Ideal for: crop tops, flared dresses, tank tops, summer boleros
Winter – Warmth and softness
When it’s cold, yarn should warm and wrap you up. Projects become thicker, sometimes oversized, but always cozy and wearable directly on the skin.
Choose:
- Wool: warms, insulates, breathes.
- Alpaca: soft and light, retains heat without adding bulk.
- Mohair: cloud-like effect, ideal for airy and warm garments.
Recommended yarns:
Barry – chunky wool for cozy sweaters
Armstrong – top-quality baby alpaca
Nirvana – soft-blown yarn with wool and mohair
Ideal for: cardigans, pullovers, capes, oversized vests
Mid-season – Versatility and adaptability
Autumn and spring are seasons with variable weather. You need a medium-weight yarn, not too warm nor too light, to create garments that can be layered and easily adapted.
Choose:
• Cotton-acrylic blends: combine the freshness of cotton with the durability of acrylic
• Elastic yarns: for a more flexible fit
• Fantasy yarns: perfect to make even a simple pattern unique
Recommended yarns:
Metallica – gradient yarn for mid-season
Alicia – light and colorful blend, with great performance
Ideal for: shrugs, lightweight cardigans, layering tops, lacy sweaters
BONUS TIPS – 5 Questions to ask yourself before choosing yarn:
- In which season will I wear the garment?
- Does the project require a structured or fluid yarn?
- How elastic or drapey should it be?
- Is the yarn easy to wash?
- Do the color and texture enhance my favorite stitch?
GLOSSARY OF STITCHES AND TERMS
.png)
Everything you need to know to read and understand a crochet pattern.
When you enter the world of crochet, you’ll find that every pattern has its own language, made up of abbreviations, acronyms, and symbols. It might seem like a secret code, but once you learn it… you won’t want to go without it!
This module gives you an essential mini glossary to read, write and understand every crochet instruction – from the basics to more complex designs.
KEY ABBREVIATIONS
(the ones you’ll encounter almost everywhere)
- Ch – Chain stitch: The foundation of almost everything. Made by wrapping the yarn over the hook and pulling it through the loop. Used to start a project or create spaces between stitches.
- Sc – Single crochet: A simple, dense stitch, great for edges, bases, and tight patterns. Perfect for beginners!
- Hdc – Half double crochet: Taller than sc, but shorter than dc. Quick to work and creates a soft texture.
- Dc – Double crochet: Airy and long, often found in summer garments and openwork patterns. Common in tops, cardigans, and granny squares.
- Inc – Increase: Work more than one stitch in the same space to widen the project. Useful for flaring or shaping.
- Dec – Decrease: Work two or more stitches together to reduce width. Essential for shaping: hips, shoulders, necklines, sleeves.
TERMS YOU SHOULD KNOW WELL
- Round: Used when working in the round. Each round starts and ends at the same point (e.g. hats, granny squares, circular tops). Usually closed with a slip stitch and begun with a turning chain.
- Row: Used when working back and forth. Example: front and back panels of a sweater, top panels, blankets.
- Needles: Watch out! Knitting needles are tools used in knitting, not crochet. Sometimes “needles” is used to refer to rows, but it’s best to say row for crochet and needle for knitting, in the right context.
BONUS: OTHER USEFUL TERMS
- Beg – Begin: The start of the work, often with a foundation chain.
- Invisible join: A technique to avoid the “step” at the end of a round for a cleaner finish.
- Turning chain: The chains made at the start of a row (1 for sc, 2 for hdc, 3 for dc) to lift the work to the height of the next stitch.
- Pattern: A diagram or written instruction for a project.
- Gauge swatch: A small square (e.g. 10x10 cm) used to check how many stitches and rows are needed.
Essential for making garments that fit well!
Subscribe to the newsletter to receive tutorials, tips, exclusive projects, and the next episode of this crochet-chic series straight to your inbox. Your dream handmade wardrobe starts here.
Rosaria Tessiland®
.jpg)


